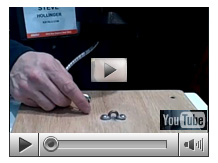
How to mount a Kayalite®, Kayacam® or other Kayalu "Secure‑Attach" product
For larger size window, hover mouse over video and click on YouTube logo.
Clip on, pull cord, and cinch. Good to go!
Our Kayalite and Kayacam products have one thing in common — their patented Kayalu "Secure-Attach" mast and mounting system.
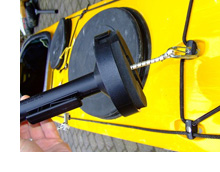
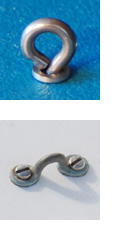
A Kayalu product with our "Secure-Attach" mounting system, such as a Kayalite, can be quickly and firmly attached to a kayak, canoe or any other unstable or irregular surface.
In a pinch, the product can be clipped to a kayak's deck rigging or carry handle, a free cleat, existing bungee or deck line.
For best results and optimal stability, as shown in the step-by-step diagrams that follow, we recommend that the product be fastened to an existing eyelet, deck loop or pad eye, a topside drain plug handle, or any other fixed point on the surface of attachment.
Once clipped, the cable is pulled into tension and cinched.

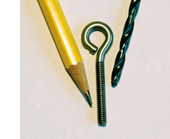
If your deck surface does not have an eyelet or a fixed point of attachment, we offer a do-it-yourself eyebolt kit including hardware, drill bit and installation instructions.
The 5/32" hole required for an eyebolt is tiny — barely noticeable. It's well worth the advantages provided by our products and practical for a variety of alternate uses during daylight.
Clipping to an Eyelet, Deck Loop or Pad Eye
NOTE: The single-point attachment method is recommended for kayaks, canoes, dinghies, waterboards, boats and all applications presenting a rough, irregular contoured or unstable surface.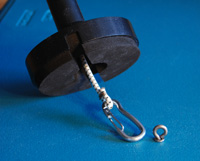
1. Identify a single point of attachment on the surface, such as an eyelet, deck loop, pad eye, or topside drain plug handle.
As mentioned above, if you do not have an eyelet or pad eye, we offer an easy, do-it-yourself eyebolt installation kit.
To open a new window with information about our do-it-yourself Eyebolt Kit click here.
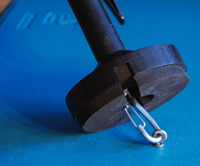
2. Clip the steel fastener to the eyelet.
Once the clip is attached, the product can not be lost even if its cord is left loose, since the cord is knotted to keep it from pulling through the mast.
The base has a padded cushion to protect the surface below.
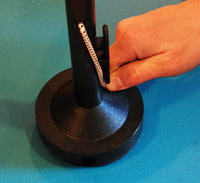
3. Pull the bungee cord firmly downward toward the base.
For a secure attachment, make sure the bungee is taut. The opening in the mast is flanged, so you don't have to worry about cutting or abrading the bungee as it is pulled very tight.
How it works: The steel clip is withdrawn up and into the mast, applying tension to the base, pulling the base to be mated in pressure against the surface of attachment.
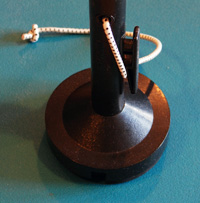
4. Cinch the bungee cord by pulling it upward into the jam cleat on the mast.
That's it! No need to wrap the bungee around the cleat because the jam cleat is quite secure.
For an extra firm attachment, you can wrap the loose end of the bungee around the cleat.
Quick-clipping to existing Bungee Cords, Deck Rigging, Carry Handle, etc.
NOTE: While the fixed point of attachment described above (eyelet, deck loop, etc.) is optimal, the following less-stable attachment method may be useful for quick-rigging in a pinch, or for  use on decks having  flat, stable surfaces.


       The following less-stable attachment method is not recommended for Kayalu products with added height such as the the Kayalite XT (21" and 28") or Kayalite Extension Kit.
This attachment method is also generally not recommended for use with the Kayacam camera mount because it may not provide adequate stability for video production.
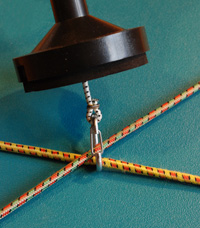
1. Clip the steel clip onto one or more taut bungee cables or deck netting.
If a second taut bungee cord is available to cross at a right angle (as shown), attach the steel clip at the intersection of both bungee cords for improved stability.
Notice that once the clip is attached, the product can not be lost, even if the clip is not pulled tight.
Also notice how the base has a padded cushion to protect the surface below.
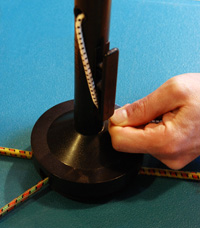
2. Pull the bungee cord so it pulls the clip up and into the base.
The steel clip is withdrawn into the mast, applying tension to the base and pulling it downward toward the surface of attachment.
One of the bungee cords on the deck passes through the two notches in the base, while the second cord on the deck sits beneath the cushion.
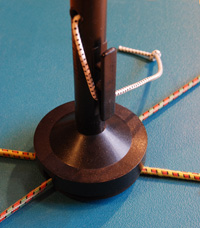
3. Cinch the bungee cord by pulling it firmly upward into the jam cleat on the mast.
That's it!
For an extra firm attachment, you can wrap the loose end of the bungee around the cleat.
